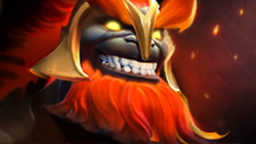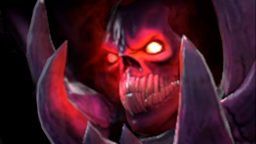
Underlord
Neither myth nor song exist to tell of their coming.
Deep below the surface of the world lay unknown wonders and horrors. Down and down again, well beneath the slithering magma fields and simmering roots of dormant volcanoes stands the obsidian city of Aziyog, its incomparable stonework spanning an endless cavern. Within honeycomb walls mortared with the bones of countless slaves lies the domain of the Abyssal Horde, and their brutal underlord Vrogros.
Armed by the monstrous forgemasters of his kind and well-practiced in the arts of the Dark Rift, Vrogros is able to conjure forth flame and crippling malice through the twist between worlds. He seeks always to expand his holdings, destroying or enslaving all he encounters. Yet the lands offered by the subterranean realm are few, and so his sights have turned upward. By his command the first waves of abyssal invaders have already marched through the rift, a few doomed legions meant merely to test the might of nations above. Now, as his full force readies itself for unending conquest, Vrogros himself steps into a sunlit world to announce his coming reign. Those who face the Underlord will bow and pay tribute, or be crushed where they stand.
Base STR
25 +3.2
Base AGI
12 +1.6
Base INT
18 +2.3
Move Speed
290
Attack Range
200
Base Armor
3
Attack DMG
37–43
Projectile
900
Innate Abilities

Invading Force
After an allied hero Teleports, they temporarily gain Damage Reduction and Movement Speed. Allies receive 2x bonuses if teleporting via Fiend's Gate.
DAMAGE REDUCTION:
3.7%
MOVESPEED:
9.5%
BUFF DURATION:
5
Abilities

Firestorm
Cooldown
16 / 15 / 14 / 13s
Mana
110 / 125 / 140 / 155
Calls down waves of fire that damage enemy units in the target area, burning for additional damage over time.
RADIUS:
425
WAVE COUNT:
6
WAVE DAMAGE:
30 / 55 / 80 / 105
WAVE INTERVAL:
1
MAX HP BURN DAMAGE:
1.5 / 2 / 2.5 / 3%
BURN DURATION:
2
The flames of conquest blaze forth from the darkest depths of the abyss.

Pit of Malice
Cooldown
30 / 25 / 20 / 15s
Mana
110 / 120 / 130 / 140
A deadly pit is conjured at the target location; any unit that enters will be damaged and rooted. Each enemy unit within the pit are affected by the root only every 3.6 seconds.
RADIUS:
400
PIT DURATION:
12
DISABLE INTERVAL:
3.6
ENSNARE DAMAGE:
20 / 30 / 40 / 50
DISABLE DURATION:
1.5 / 1.6 / 1.7 / 1.8
Twisting into the seams of reality itself, Vrogros' manifest hatred paralyzes those who defy his will.

Atrophy Aura
Nearby enemy units are weakened, losing a portion of their base damage. If an enemy dies while under this effect, Underlord gains temporary bonus damage.
RADIUS:
900
DAMAGE REDUCTION:
8 / 16 / 24 / 32%
BONUS DAMAGE (CREEP):
2 / 4 / 6 / 8
BONUS DAMAGE (HERO):
30 / 35 / 40 / 45
DURATION:
30 / 40 / 50 / 60
- Break disables the Attack Damage Reduction aura and prevents Underlord from gaining new stacks.
To merely stand in the presence of the Underlord is to feel the conviction of battle sapped from one's soul.

Fiend's Gate
Cooldown
110 / 105 / 100s
Mana
175
Opens 2 portals, one next to Underlord and one in the target location. Heroes can channel a portal for 3.5 seconds to teleport to the other side. Portals have to be at least 1500 away from each other.
DURATION:
20
COOLDOWN:
110 / 105 / 100
- Double-click to teleport to your team's base, in front of your fountain
They come without warning, leaving fire and blood where kingdoms once flourished.
Talent Tree

Aghanim's Scepter
Pit of Malice
Increases radius of the Pit of Malice.
Fiend's Gate
Summons a Pit of Malice around each of the portals. Reduces cooldown.

Aghanim's Shard
Firestorm
Firestorm can be allied targeted. When used that way, the Firestorm follows the hero around. The wave count is increased, and tick rate / duration time occur more quickly.
Strategy
When to Pick Underlord?
There is a specific type of offlaner that the current meta rewards — and the description is almost written for Underlord. Sportskeeda confirmed the 7.41a meta wants tanky frontline offlaners who control teamfights and keep important enemy cores out of the fight. DM's A-tier placement alongside Brewmaster, Kunkka, and Phoenix confirms the professional consensus. Strafe's offlane tier list went further, naming Underlord alongside Centaur, Axe, and Tidehunter as the top frontline picks while specifically calling out that "the Pit of Malice makes mobility heroes cry." Every single piece of that framing is accurate and has been accurate for years, which is the beauty of this hero—Underlord has been a consistent offlane threat across patches because his kit is built on abilities that are independently oppressive without requiring complex execution.
Atrophy Aura is now his innate ability—freed from an ability slot entirely—and the ramifications of this are significant. The aura passively reduces every nearby enemy hero's attack damage by up to 30% at max level scaling with Underlord's hero level. A fully farmed Terrorblade sitting at 400 attack damage with Atrophy Aura active is effectively dealing 280 damage per attack to Underlord and his nearby allies. Combined with Crimson Guard's damage block active or natural armor from items, the enemy physical carry is operating at a fraction of their theoretical output just by being in the same area as the Underlord. The aura also grants Underlord temporary bonus attack damage for every unit that dies within it—hero kills during a teamfight stack the bonus rapidly, and in the current patch Underlord's attacks CLEAVE while bonus damage from Atrophy Aura stacks are active, meaning an Underlord with 150 bonus damage from three hero deaths in a teamfight is cleaving that damage to nearby units simultaneously. Firestorm compounds this identity further — waves of fire that deal flat magic damage per wave PLUS a percentage of the target's maximum health as burn damage over time. Against the current meta's dominant tanky carries—Wraith King with 4000 HP and Night Stalker with a Radiance build at 3500 HP—the percentage-based component of Firestorm deals proportionally more effective damage than it would against squishy heroes. A fully maxed Firestorm can deal up to 24% of the target's maximum HP as burn damage before the flat damage is even counted. Pit of Malice then locks them in place long enough for all those Firestorm waves to connect.
Pit of Malice is the ability that makes Underlord genuinely hard to play against — and the framing of "really hard to play against" is exactly right. The pit lasts seven seconds, damages anyone who enters for 50 to 200 magic damage, and roots them in place for up to 3 seconds. Every enemy hero who walks INTO the pit radius triggers the root—independently. A single Pit of Malice can sequentially root five separate enemy heroes over its duration as they each attempt to chase through it, escape through it, or blink into it. It counters Blink Dagger—the blink lands heroes directly in the pit area. It counters the current meta's aggressive approach because any hero who charges through the Pit of Malice to reach Underlord gets rooted the moment they enter. Fiend's Gate creates two portals allowing allied heroes to teleport globally with damage reduction and movement speed bonuses after transit—giving Underlord's team one of the best counter-initiation tools in the game. He is disgusting in high-HP physical damage carries where the percentage of Firestorm damage and attack damage reduction from Atrophy Aura both scale with enemy strength; in low-mobility lineups that cannot dodge Pit of Malice; and in games that go longer where his aura compound advantage becomes increasingly noticeable. Avoid him in heavy magic burst teams that kill him before Firestorm channels, in heroes with reliable Break effects that disable Atrophy Aura, and specifically in lineups with the current meta's fast games that end before Underlord's scaling becomes relevant.
Tips & common mistakes
- Pit of Malice roots every enemy who ENTERS the area once per cast—most pub Underlord players cast it on top of grouped enemies already standing in place, catching one or two heroes who are hit immediately. The correct use is placing Pit of Malice in the path between fleeing enemies and their escape route or directly on top of blink landing locations. A pit of malice placed one step ahead of a retreating hero roots them the moment they attempt to step through it—placing it BEHIND a retreating hero achieves nothing because they have already passed the area.
- Atrophy Aura grants Underlord temporary bonus attack damage for every unit that dies within its range, and his attacks CLEAVE while bonus stacks are active—most pub Underlord players never think about positioning to maximize death coverage under the aura during team fights. Every creep that dies under Atrophy Aura grants small bonus damage stacks; every hero kill grants massive ones, and with cleave active, Underlord's right-clicks are hitting multiple nearby enemies simultaneously with the stacked damage. After a good teamfight engagement where three or four enemies die under the aura, push forward aggressively—the temporary damage window with cleave is one of Underlord's highest DPS windows in the game.
- Firestorm deals percentage-based max HP damage on top of flat magic damage — most pub Underlord players treat it as a flat nuke and never consciously target the highest-HP enemies in the area. Against a fight with a 4000 HP strength carry and a 1000 HP support both standing in Firestorm range, the strength carry is taking four times the percentage damage that the support is taking from the burn component. Position Firestorm specifically to hit the enemy carry rather than the squishy support standing nearby.
- Aghanim's Shard allows Firestorm to be cast on an ALLIED hero, centering and following them as they move—most pub Underlord players treat Shard purely as a self-cast upgrade and never think about casting Firestorm on a mobile allied hero. Casting Firestorm on your allied Lifestealer who is rampaging through the enemy team means every enemy near the Lifestealer is continuously taking wave damage plus percentage HP burn as the Lifestealer moves through them—turning your carry's dive into a walking flame zone that deals cumulative damage to everyone they pass through.
- Fiend's Gate channels for 3.5 seconds before teleporting — most pub Underlord players start channeling when they are already under attack, getting interrupted by damage before the channel completes. The correct use is beginning the channel the moment a fight goes sideways—not after you have already taken significant damage—or using it proactively between fights to position your team near an objective before the enemy responds. Fiend's Gate also double-clicks to open a portal to base, allowing Underlord to refresh items and return to a fight mid-engagement if the portal timing is right.
- Rod of Atos chains perfectly with Pit of Malice—most pub Underlord players buy Rod of Atos and use the active separately from the Pit of Malice. The correct combo is Rod of Atos active on the target hero, then immediately Pit of Malice on top of the rooted hero—the Atos root holds the hero stationary while Pit of Malice lands directly on them, then the Pit of Malice root begins the moment Atos expires, creating a seamless transition that maximizes Firestorm's damage window with zero gap in lockdown. Gleipnir extends this further—Gleipnir's root into Atos into Pit of Malice into Firestorm can hold a hero stationary long enough to take nearly every Firestorm wave.
Summary
A-tier in DM's offlane list, top-tier across multiple ranking sources, and one of those offlaners that the current aggressive tanky meta was specifically designed for.
Atrophy Aura as an innate passively neutering enemy carry damage from level one, Firestorm dealing percentage-based HP damage that scales against every tanky meta hero, and Pit of Malice creating a seven-second root zone that punishes every enemy who tries to pass through it—these are elements of a kit that gets stronger as games get more physical and more tanky, which is exactly what the current meta delivers. Pick him when the enemy carries are big-strength heroes.
Place the Pit of Malice in their path, not on top of them. And when the teamfight ends with four enemy heroes dead under Atrophy Aura and Underlord swinging for 200 bonus cleave damage at the tower? That is when you understand why this hero has been quietly one of the best offlaners in the game for years.
Pro Players Known For This Hero