Juggernaut
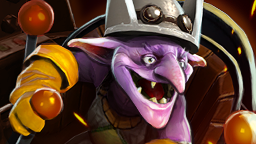
No one has ever seen the face hidden beneath the mask of Yurnero the Juggernaut. It is only speculation that he even has one. For defying a corrupt lord, Yurnero was exiled from the ancient Isle of Masks--a punishment that saved his life. The isle soon after vanished beneath the waves in a night of vengeful magic. He alone remains to carry on the Isle's long Juggernaut tradition, one of ritual and swordplay. The last practitioner of the art, Yurnero's confidence and courage are the result of endless practice; his inventive bladework proves that he has never stopped challenging himself. Still, his motives are as unreadable as his expression. For a hero who has lost everything twice over, he fights as if victory is a foregone conclusion.
Base STR
20 +2
Base AGI
32 +2.8
Base INT
14 +1.4
Move Speed
300
Attack Range
150
Base Armor
0
Attack DMG
22–24
Projectile
Instant
Innate Abilities

Bladeform
Juggernaut gains a stack of Bladeform every 2s that Juggernaut does not take damage. Each stack grants bonus base Agility and Movement Speed. Stacks fade after 2s upon taking any damage.
MAX STACKS:
10
BASE AGILITY PER STACK:
2.5%
MOVEMENT SPEED PER STACK:
1%
LINGER DURATION:
2
- Break disables the gaining of new stacks.
- Break does not disable the bonuses from existing stacks.
Abilities

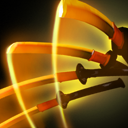
Blade Fury
Cooldown
30 / 26 / 22 / 18s
Mana
110
Causes a bladestorm of destructive force around Juggernaut, rendering him debuff immune with 80% magic resistance and dealing damage every 0.2s to nearby enemy units. Applies a strong dispel at the end of the spin.
DAMAGE PER SECOND:
85 / 115 / 145 / 175
DAMAGE RATE:
0.2
RADIUS:
260
DURATION:
5
- You can use items during Blade Fury.
- Juggernaut can still perform attacks while in Blade Fury. However, only units that are not affected by Blade Fury, such as wards or structures, will take damage from these attacks.
Yurnero's renowned katana techniques are feared by warriors and sorcerors alike.
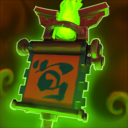
Healing Ward
Cooldown
60s
Mana
120
Summons a Healing Ward which heals all nearby allied units, based on their max health. The Healing Ward moves at 325 movement speed after being summoned. Lasts 18 / 20 / 22 / 24 seconds.
MAX HEALTH PER SECOND:
2 / 3 / 4 / 5%
RADIUS:
400
HITS TO DESTROY:
1
- The Healing Ward can be controlled.
- Multiple Healing Wards do not stack.
Of the rituals learned at the Isle of Masks, tending wounds with a bit of voodoo magic has proven to be quite useful.

Blade Dance
Gives Juggernaut a chance to deal critical damage with Blade Fury and on each attack.
CRITICAL CHANCE:
35%
CRITICAL DAMAGE:
140 / 160 / 180 / 200%
The last remnant of his heritage's commitment to bladework, Yurnero ensures that the style is remembered.
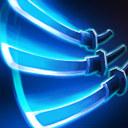
Omnislash
Cooldown
120s
Mana
200 / 275 / 350
Juggernaut leaps towards the target enemy units, and then slashes the target and other nearby enemy units at an increased attack rate. Juggernaut is invulnerable for the duration. DISPEL TYPE: Basic Dispel
SLASHES RATE MULTIPLIER:
1.4
BONUS DAMAGE:
25 / 30 / 35
BONUS ATTACK SPEED:
40
DURATION:
3 / 3.25 / 3.5
SLASH JUMP RADIUS:
425
- You can use items during Omnislash.
'The fruits of discipline; with practice comes strength.'
Talent Tree

Aghanim's Scepter
Swiftslash
Cooldown
25s
Mana
150
Performs a short Omnislash for 1 seconds.
DURATION:
1
A briefer onslaught for those less deserving of the honor.

Aghanim's Shard
Healing Ward
Increases ward healing and health.
Strategy
When to Pick Juggernaut?
Okay, I am going to stop you right there—because I said "decent carry" and the data said "56.8% win rate." Pfff... Juggernaut is performing WAY better than I expected right now, sitting right alongside Terrorblade at the top of the carry win rate charts in the current meta. And honestly? When I think about WHY he is doing so well, it makes complete sense.
The current meta is a laning patch—heroes that win their lane, create early mid-game pressure, and close games before the late-game carries come fully online are winning. And Juggernaut does ALL of that. Blade Fury's cooldown was reduced so you can spin more often—both as a farming tool and as a kill threat—and Blade Dance's critical strike was improved, making him significantly more dangerous in the laning phase than he was before.
The new innate ability gives him stacks every two seconds without taking damage, each stack granting bonus base agility and movement speed, which means a Juggernaut that is playing clean and avoiding unnecessary damage in lane is constantly accelerating his own power curve before he even spends a single gold on items.
He is disgusting in lineups with strong setup and lockdown that can hold enemies in place long enough for Omnislash to pick off critical targets—Bane, Disruptor, and Lion—heroes that hard lock a single hero while Juggernaut bounces between them with reckless abandon, dealing damage that scales terrifyingly with each critical strike from Blade Dance.
He thrives specifically because the meta's tanky offlane frontliners—Doom, Bristleback, and Tidehunter—are all heroes that Juggernaut can aggressively spin through with Blade Fury's magic immunity, removing their ability to punish him while he shoves the lane and takes towers faster than they can rotate to stop him.
He pairs beautifully with Io above all else—Tether providing the healing and Overcharge pumping his attack speed during Omnislash turns him into something genuinely obscene—but he also works great with any support that provides reliable lockdown so Omnislash can be used offensively rather than defensively for maximum kill potential.
Avoid picking him into lineups with a lot of Grievous Wounds and healing reduction—Ancient Apparition completely destroys his Healing Ward, which is his most important defensive tool in every extended fight, and a Juggernaut with no Healing Ward in a drawn-out battle is just a strength hero with a spin that eventually runs out of HP and dies.
Also feels genuinely terrible for Axe specifically—Berserker's Call forces Juggernaut to attack Axe, which means Counter Helix is proc-ing constantly, and if Omnislash is used while Axe activates Berserker's Call all the bounces are redirected to Axe, and all the Counter Helixes destroy Juggernaut's health bar from the inside out in the most embarrassing way possible.
And if the enemy has a lot of high-burst magic damage that can nuke him through Blade Fury's magic immunity window? Build BKB and stop complaining—because a Blade Fury that doesn't kill anyone and runs out while three heroes are still alive with full cooldowns pointed at you is a very uncomfortable situation to be in.
Tips & common mistakes
- People activate Blade Fury and immediately stop moving like they are a turret. You are STILL MOBILE during Blade Fury—use it aggressively to chase, to dodge projectiles, to escape dangerous situations, and to reposition for the follow-up right-click kill after the spin expires. A stationary Blade Fury Juggernaut is just a spinning target that the enemy walks around. A moving one is a nightmare to deal with.
- The new innate stacks that give bonus agility and movement speed require you to not take damage for two seconds per stack. This means the laning phase is not just about last hits—it is about playing clean, avoiding unnecessary trades, and letting the stacks accumulate naturally. Stop walking into obvious harass from the enemy support just to contest a creep because every hit they land is resetting your stack timer and slowing your entire power curve.
- Healing Ward placement is one of the most underrated skills in Dota 2, and most Juggernaut players are terrible at it. The ward needs to be placed where your entire team is going to be standing during the fight—not where you are standing when you place it, because by the time the fight develops, you are nowhere near the spot you dropped it. Always think about where the fight is moving BEFORE you drop the ward, and never place it in open ground where the enemy can walk up and right-click it for free in two seconds.
- Omnislash is completely wasted on a single isolated target in an empty area with no nearby enemies. Every bounce of Omnislash deals damage — and every bounce happens to the nearest enemy hero. In a grouped teamfight with multiple targets nearby, Omnislash becomes an AOE massacre that bounces between every hero simultaneously. In a 1v1 duel in the jungle, it is just a fancy right-click combo on one person. Always use it when multiple heroes are in range.
- Blade Fury grants magic immunity during its duration — this means you can use it to dodge incoming stuns, hexes, and disables with correct timing. If Bane is casting Fiend's Grip on you, spinning immediately negates the entire channel. This is not a coincidence; it is an intentional part of his kit that most players only discover by accident and never practice deliberately.
- Stop buying Maelstrom as your first item in every single game. Yes, it is a strong farming tool. But if the enemy has heroes that can kill you before you have any defensive items, dying every fight with a Maelstrom that you never get to use is not a farming strategy—it is a donating strategy. Read the game; buy BKB or a defensive item first if the enemy has heavy disable, and then go Maelstrom into Mjollnir when you have the survivability to actually stay alive long enough for the chain lightning to matter.
- Omnislash can be countered by Linken's Sphere—if the primary target blocks the spell with Linken's, the entire ultimate fizzles, and you have wasted your most important cooldown on a magic stick. Always check what items the enemy carry is building, and if they have Linken's, use Omnislash on a different target first or make sure the Linken's is popped before you commit to the full ultimate.
Summary
Juggernaut is performing better than people are giving him credit for right now—a 56.8% win rate alongside Terrorblade is not "decent"; that is genuinely strong, and the recent buffs to Blade Fury cooldown and Blade Dance critical strike combined with the new innate agility stacking mechanic have quietly pushed him into a carry that dominates lanes, farms aggressively, and closes games before the enemy team can reach the item timings that would make the matchup harder.
Pick him into lineups with strong lockdown, keep your innate stacks healthy by playing clean in the early laning phase, drop your healing ward where your team is actually going to be standing, and make the enemy team regret every single decision to cluster together within Omnislash bouncing range of each other.
He is not the most flashy carry in the pool right now, and he never will be—but a juggernaut that plays clean, hits his item timings, and uses his toolkit correctly is one of the most reliably game-winning carries you can pick up in the current meta. Just don't pick him up with Axe and then activate Omnislash into a Berserker's Call. I beg you.